
Appearance
Configure SMTP on WordPress
Spookhost includes the GoSMTP Pro version for free, which allows you to easily configure your WordPress website to send emails using SMTP. This is useful for ensuring that your emails are delivered reliably and not marked as spam.
INFO
You may use any SMTP plugins as you wish, but we recommend using GoSMTP Pro for its ease of use, full feature set due to our free Pro offering, and compatibility with Spookhost's infrastructure.
Setting up GoSMTP Pro
- Make sure you have WordPress installed (see Installing WordPress for instructions), and SoftWP set up (see Free Premium/Pro Plugins for instructions).
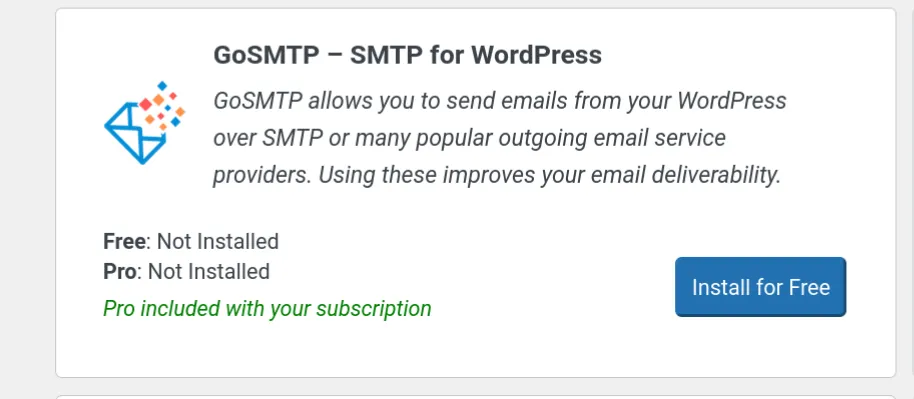
- Install GoSMTP Pro
Configuring SMTP
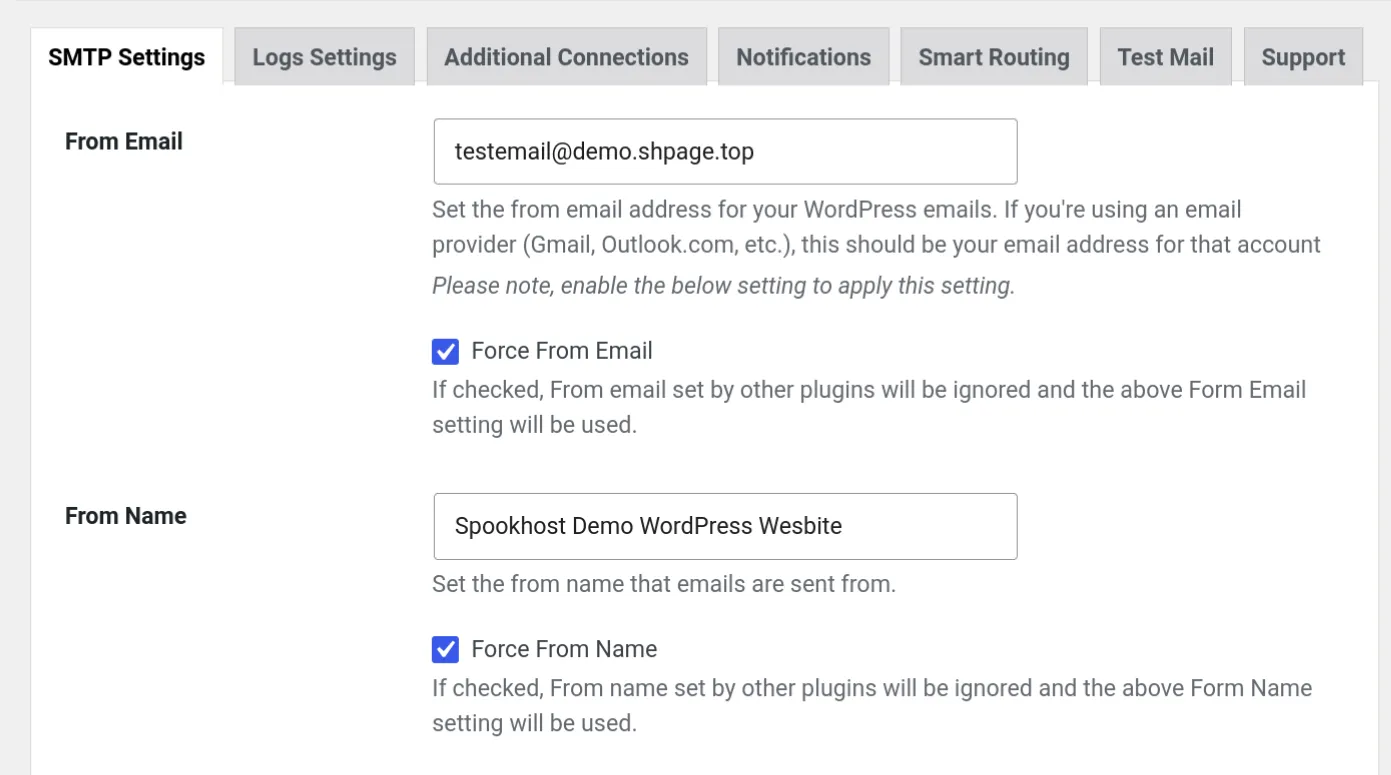
- In GoSMTP -> Settings, input the "From Email" and "From Name" fields with the email address and name you want to use for sending emails.
TIP
We recommend enabling "Force From Email" and "Force From Name" to ensure that all emails sent from your website use the specified email address and name.
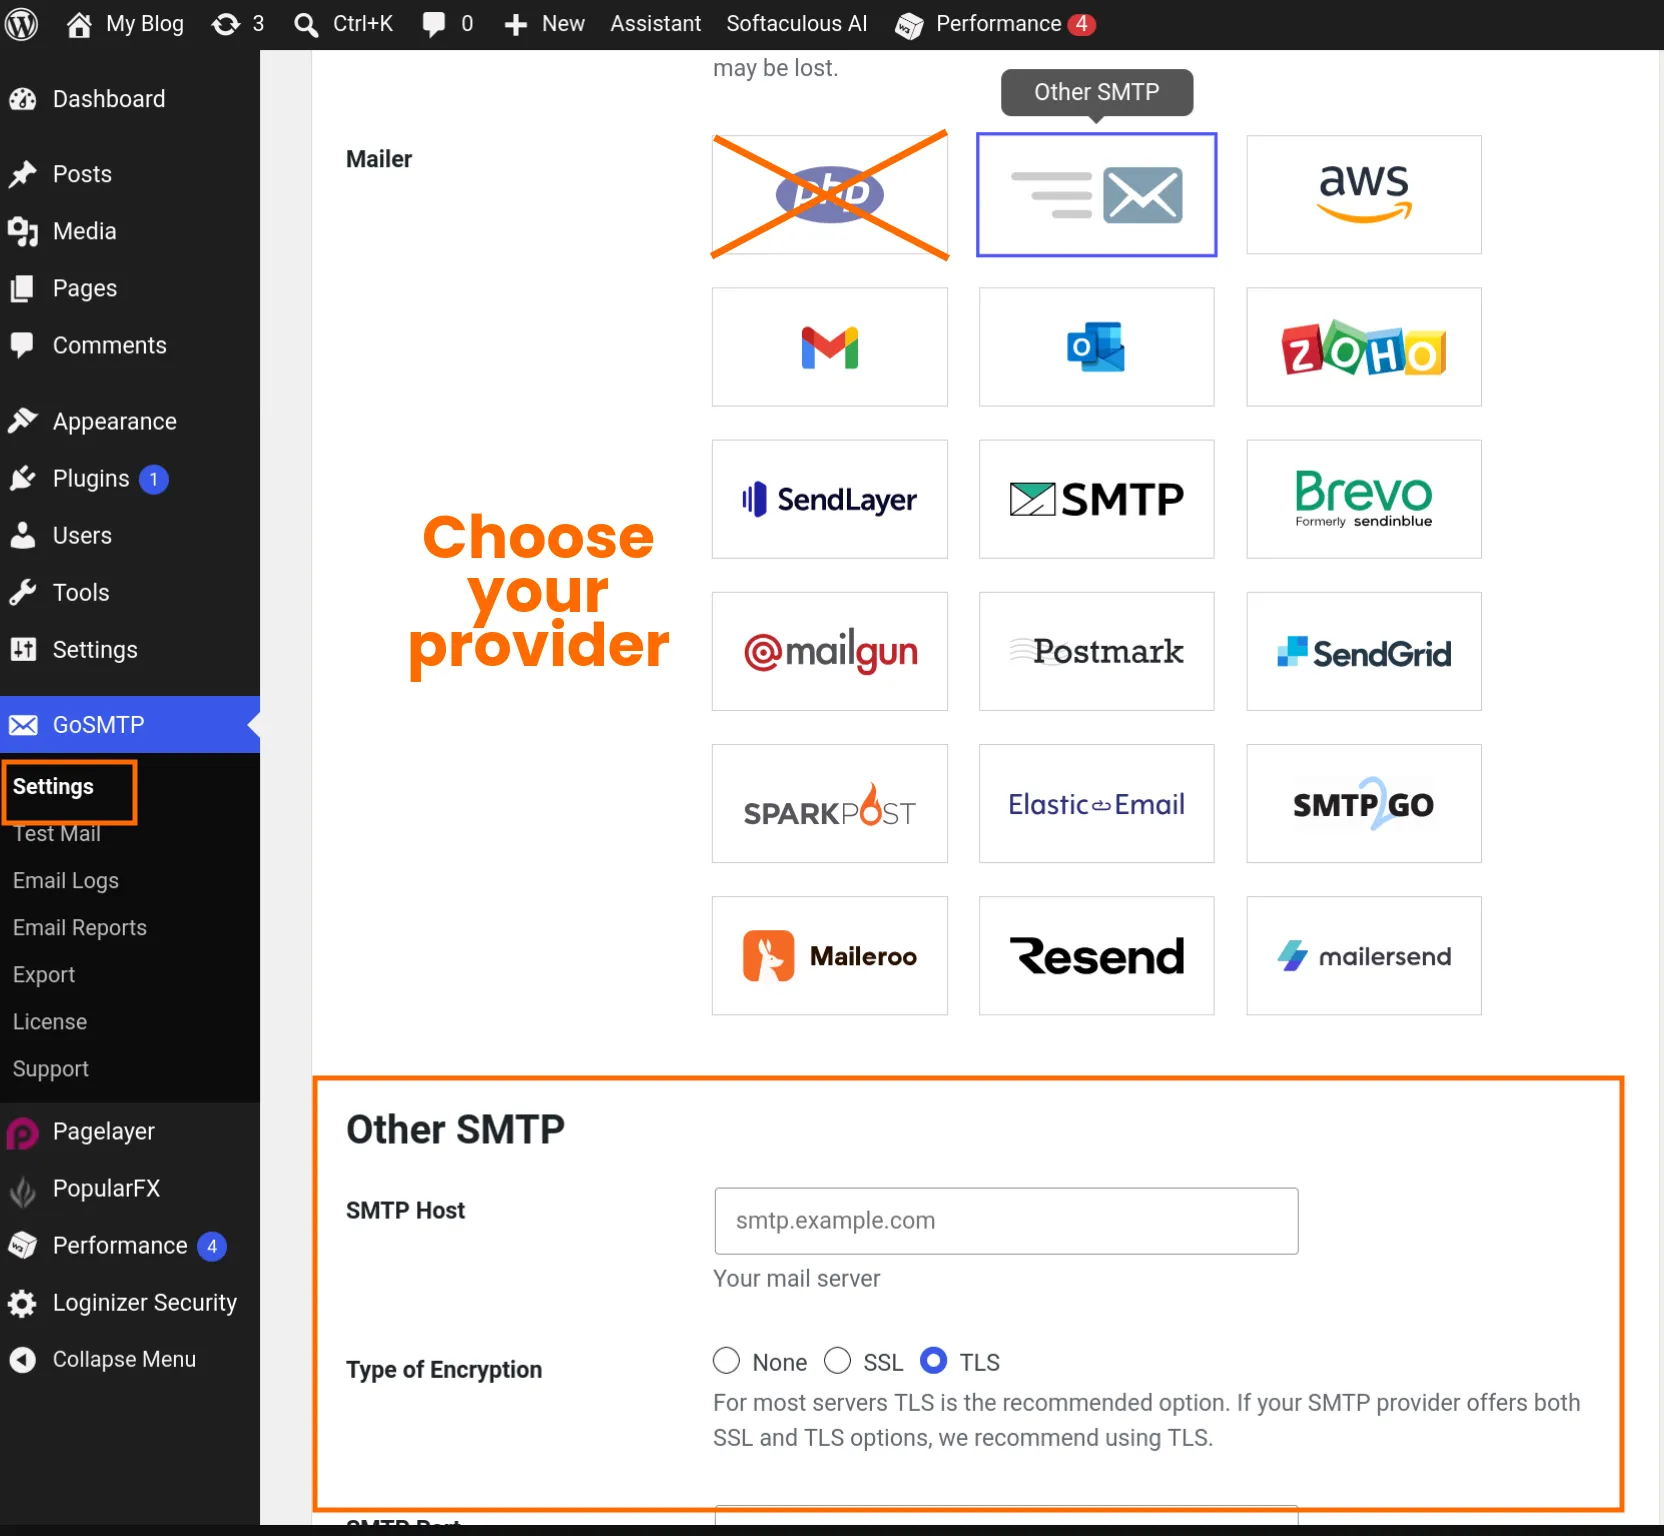
- Choose your Mailer, if it is not listed, select "Other SMTP" and fill in the SMTP details.
WARNING
Note that the "Mail" php mail() option is NOT SUPPORTED on Spookhost, and will not work. You must use external APIs to send emails.
- Click "Save Changes"
- Test Email Delivery
- In GoSMTP -> Settings, go to the "Test Mail" tab, input your receiving email address, and click "Send Email"
WARNING
You should input an email address that can RECEIVE emails (e.g. Gmail), this is NOT the same as the "From Email" address you configured earlier.
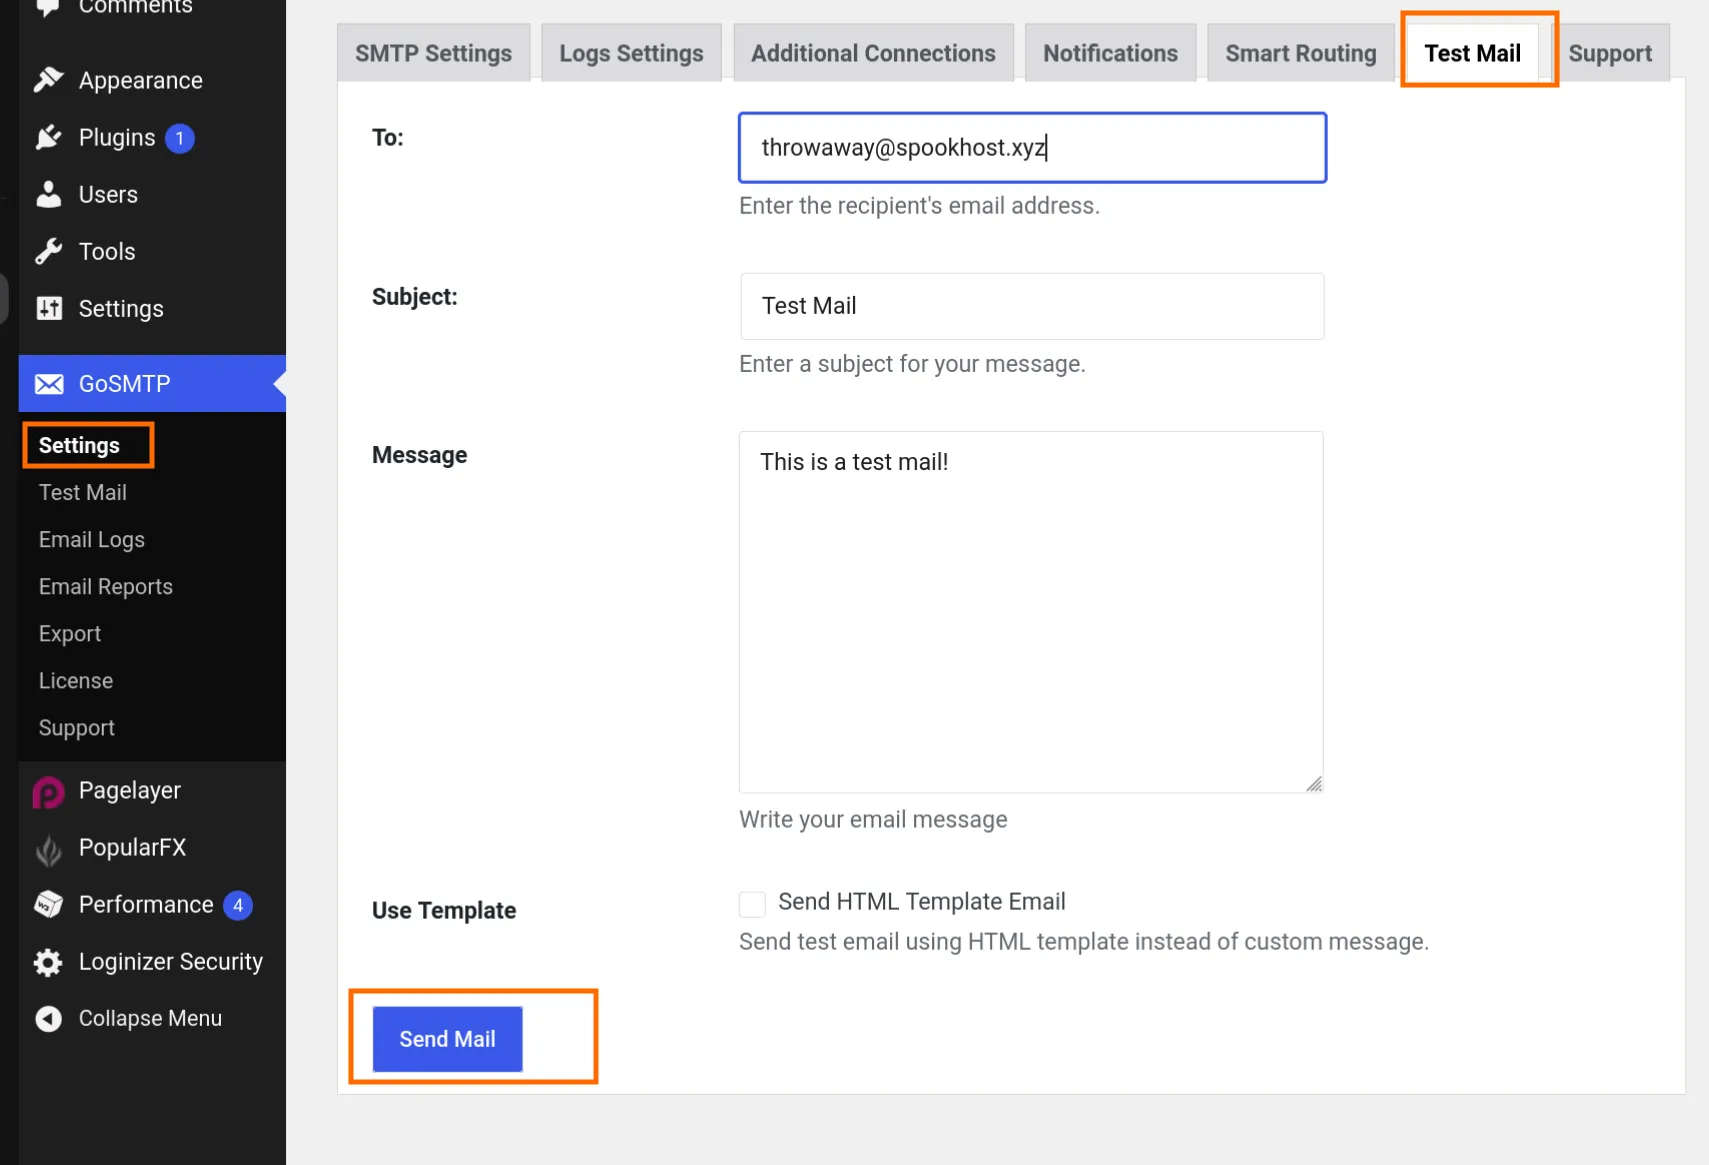
- In GoSMTP -> Settings, go to the "Test Mail" tab, input your receiving email address, and click "Send Email"
- If you receive the test email, your Email integration is working correctly. If you do not receive the test email, check your Email settings and try again.

Integrating with SMTP2GO via API Key (Recommended)
INFO
For more info on setting up SMTP2GO on Spookhost, see SMTP2GO Integration.
Make sure you have GoSMTP Pro installed and configured (see Setting up GoSMTP Pro for instructions).
INFO
While GoSMTP and SMTP2GO has a similar name, they are owned by completely different companies and are not directly related.
In GoSMTP -> Settings, input the "From Email" and "From Name" fields with the email address and name you want to use for sending emails. We recommend enabling "Force From Email" and "Force From Name" to ensure that all emails sent from your website use the specified email address and name.
INFO
You can only use @domain.com if the domain is a verified sender in SMTP2GO
In the "Mailer" dropdown, select "SMTP2GO"
Fill in your SMTP2GO api key (See here)
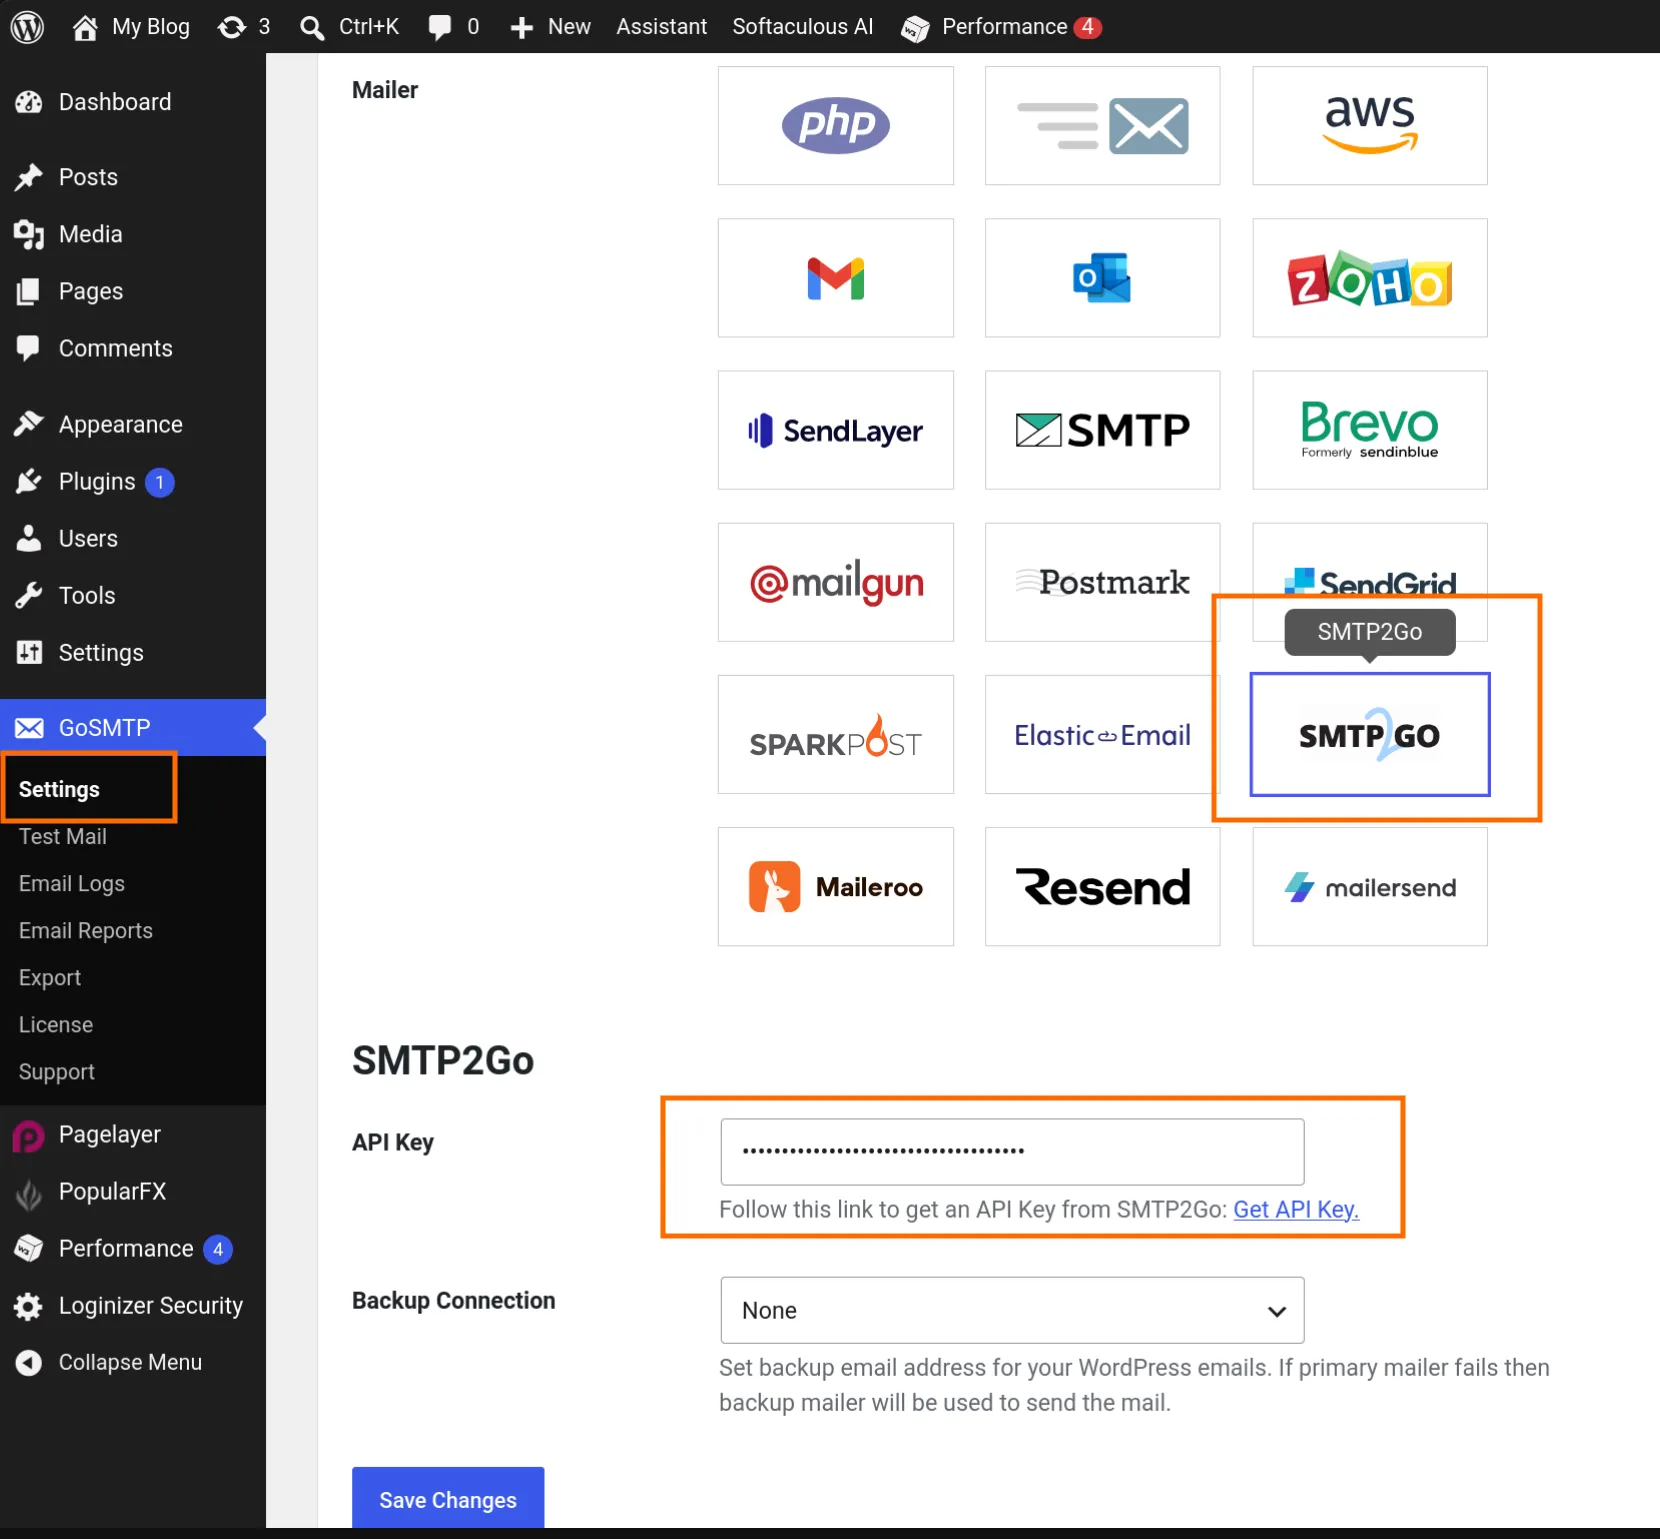
Test Email Delivery
- In GoSMTP -> Settings, go to the "Test Mail" tab, input your receiving email address, and click "Send Email"
WARNING
You should input an email address that can RECEIVE emails (e.g. Gmail), this is NOT the same as the "From Email" address you configured earlier.
- In GoSMTP -> Settings, go to the "Test Mail" tab, input your receiving email address, and click "Send Email"
If you receive the test email, your SMTP2GO integration is working correctly. If you do not receive the test email, check your SMTP2GO settings and try again.
Integrating with SMTP2GO via SMTP
Make sure you have GoSMTP Pro installed and configured (see Setting up GoSMTP Pro for instructions).
INFO
While GoSMTP and SMTP2GO has a similar name, they are owned by completely different companies and are not directly related.
In GoSMTP -> Settings, input the "From Email" and "From Name" fields with the email address and name you want to use for sending emails. We recommend enabling "Force From Email" and "Force From Name" to ensure that all emails sent from your website use the specified email address and name.
INFO
You can only use @domain.com if the domain is a verified sender in SMTP2GO
In the "Mailer" dropdown, select "Other SMTP" and fill in the details (see here)
INFO
The "SMTP2GO" Mailer option is for using SMTP2GO via API Key, which is the recommended method. If you want to use SMTP2GO via SMTP, you must select "Other SMTP" and fill in the SMTP details.
SMTP Host: mail.smtp2go.com
Type of Encryption: SSL
SMTP Port: 465
SMTP Authentication: Yes
SMTP Username: <your SMTP2GO SMTP username>
SMTP Password: <your SMTP2GO SMTP password>
Disable SSL Certificate Verification: No / Unchecked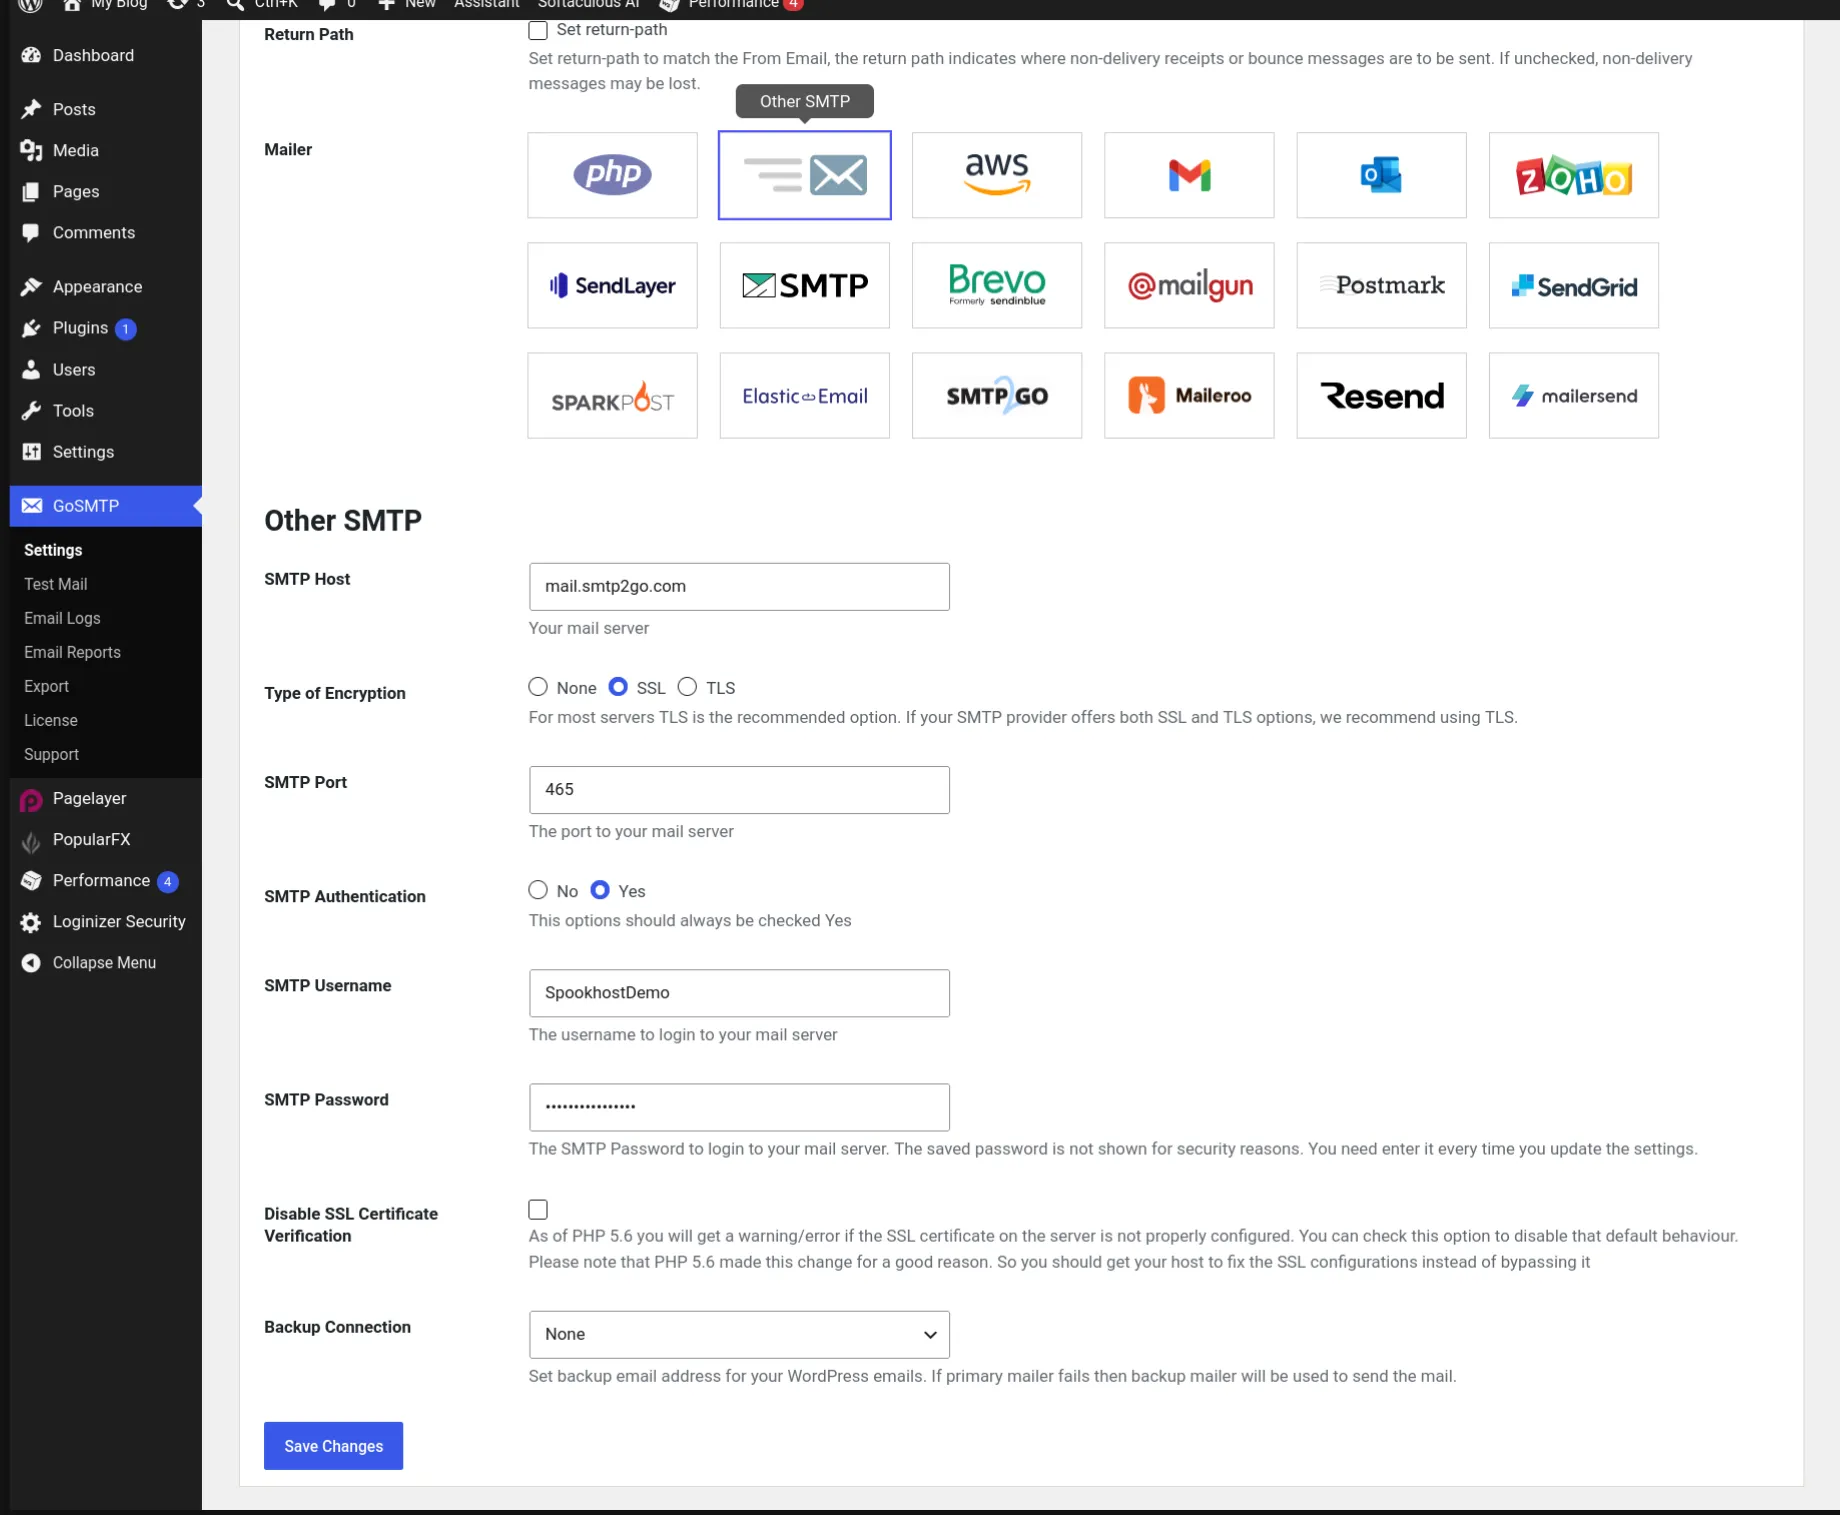
Test Email Delivery
- In GoSMTP -> Settings, go to the "Test Mail" tab, input your receiving email address, and click "Send Email"
WARNING
You should input an email address that can RECEIVE emails (e.g. Gmail), this is NOT the same as the "From Email" address you configured earlier.
- In GoSMTP -> Settings, go to the "Test Mail" tab, input your receiving email address, and click "Send Email"
If you receive the test email, your SMTP2GO integration is working correctly. If you do not receive the test email, check your SMTP2GO settings and try again.